Wednesday, December 14, 2011

Quick! It's a Christmas Craft for the Chirrens!

This is going to be quick because well, I have a few other crafts to get to this evening, what with Christmas hot on my heels and a husband who very possibly could hop online to chat soon!

Those of us who've been Pinterested in pinning and testing out new crafts have probably seen this one.  Borax + boiling water + pipe cleaners (and maybe even yarn) = Awesome and easy Christmas ornaments for the kids to make!

I bought pipe cleaners at the Dollar Store, grabbed a box of borax from the grocery store and gave it a try last night.  It was really easy and fun.  The hardest part for the girls was being careful with the boiling water (p.s., I used my electric tea kettle to heat up batches of water quickly, which made pouring easier for them) and the hardest part for me was waiting!  But, it was really fun watching the crystals form over the course of the evening. 

Here's the link I followed to create my first ornaments.  I have yet to spray them or try any other type of preservation.   I'll update if we get that far before moving on to our next project, which will probably involve Borax and maybe some Elmer's glue (Flubber, anyone?).


So pretty!  Green and red pipe cleaners. 


The white yarn I used to hang the pipe cleaners in the Borax solution was almost better than the pipe cleaners!  The frayed pieces of yarn, almost invisible unless you're looking hard for them, created little droplets of crystals hanging from the yarn.  Stay tuned for more yarn-dippin'.


The girls came up with lots of great ideas for ornaments that we'll, no doubt, be trying over the next few weeks.  Here's a curly icicle and the start of a few candy canes.


I'm sort of thinking this newfound art project might turn out to be something similar to the first week of deep-fryer ownership.  Time to think of all the different things we can dip.

Enjoy!

Thursday, December 8, 2011

The Banana Bread

This doesn't need much introduction, but if you try it, you'll LOVE it!  That's all I have to say right now.  Oh, except that this stuff freezes really well and the frosting, while not mandatory, adds a certain yum to it.


Banana Bread/Cake

3 bananas, mashed
1 cup sour cream
1/4 cup margarine
1  1/3 cup white sugar
2 eggs or 1/2 cup egg product
1 tsp. vanilla
2 cups flour 
1 tsp. baking soda
1 tsp. baking powder
1/4 tsp. salt
1 tsp. cinnamon
1/2 tsp. nutmeg
dash of clove powder

Handful of any of the following:  dried apricots, golden raisins or boiled cranberries
1/3 cup sliced almonds (they are optional, but when you toast them in a fry pan first, they add SO much yummy goodness!!)

Grease and flour a 9x13 pan (I use a Pyrex dish for best results) or two 7x3 loaf pans.  Preheat oven to 350 degrees.

Mix bananas and sour cream.  Set aside.  Mix margarine and sugar until well blended.  Add eggs, one at a time.  Then stir in vanilla, banana/sour cream mixture and raisins/apricots/cranberries.  Combine flour, salt, baking powder and baking soda.  Stir into mixture and pour into pan.  If using almonds, sprinkle them on top.  Bake at 350 for 50 minutes or until toothpick inserted into center of cake comes out clean.

Serve with frosting or butter.  This cake freezes VERY well!

My frosting recipe is really easy, it's just two 8 oz. packages of cream cheese, 1/2 cup margarine, 2 cups powdered sugar, 1 tsp. vanilla and lemon juice to taste.  Mix cream cheese, butter, vanilla and 1 cup of sugar together.  Add additional sugar until desired sweetness is reached.  Add 1/2 tsp. lemon juice and adjust up from there if more tartness is desired.  This makes a good amount of frosting, but this frosting also freezes well for you to save in case the kids want to frost cookies or cupcakes.  Enjoy! 

That carbuncle is actually a juicy, tart cranberry.  This loaf is FULL of them!  Oh, yeah!

It's All About The Cranberries

I've always been fond of cranberries.  I've even tried to grow them once.  I failed, but I might try again someday...when I don't live in the middle of a drier-than-a-popcorn-fart desert.


The berry is a pretty, bright red little gem.  It's delightfully tart and please, don't even get me started on its antioxidant benefits!  And, let's face it, it's harvested using water, and that is just too cool.  There's something so fascinating to me about the look of a cranberry bog at harvest time.  And did you know it's only one of three fruits native to North America?  Yes, it's true!  Check it out.

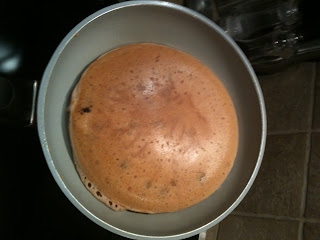
So, when I asked the girls the question parents all over the world ask their families every day ("So, what do you want for dinner tonight?") they gave me a one-word answer..."PANCAKES"!  I blame my brother because he fed his girls pancakes for dinner last night and then posted the picture on Facebook.  I never stood a chance of cooking anything else!

This time of year is always fun for me because I bake, cook and generally love running the oven instead of the heater.  Cranberries are one of those seasonal items I can only find this time of year.  So whenever possible, I buy a bag at the store and stuff it in my freezer, cataloging its purchase in the back of my mind.  

Twin A gives her seal of approval


Tonight was the night.  It's been a few weeks since I've worked cranberries into a meal, so I figured this would be the perfect opportunity to antioxidize the twins and see just how delicious these berries would be if I threw them in the batter.
They were a hit!  I don't have a recipe other than to tell you to follow the directions on a box of Bisquick (only one egg, though...keep those babies fluffy).  I added cinnamon, maple flavor and some vanilla.  For the cranberries, I put them in a pot of water on the stove and simmered them for a bit....just long enough to soften them but not so long that they split open.  I wanted to keep the tart flavor confined.  Then, I folded them into the mix and got to flippin' the flapjacks.


Oh, the disappointment.


The twins made short work of the tall stacks!  They were gone in a flash and I had to hide the extras just so I'd have something to freeze.  It was a sad moment when they realized dinner was done.  But it did my heart good to know that while they were saddened by the end of the sugarfest, they would be asking for cranberries in YET another meal.

I love to throw cranberries into everything.  Smoothies, oatmeal, yogurt...you name it, I'll cranberry it!  My version of sour cream banana bread has been morphed into cranberry-sour cream-banana bread.  And it is fanFREAKINGtastic!  Give it a try, you won't be sorry.


Look at that cranberry just BUSTING out of that loaf!


I also experimented throwing cranberries into a pumpkin cookie recipe I tried last year.  TOTALLY gonna do that one again this year.

My brother, who is an amazing cook/baker, puts them in his apple crisp.  HEAVEN!!!!

My mom does some crazy delicious stuff with them, too.  She throws them in the boiling water before she makes Stove Top stuffing.  Yeah, I know!  Those little berries turn that simple side dish into something I could EASILY make into a meal in itself.

I'm also a big fan of using a crockpot, so you can imagine my sheer joy at finding this Spiced Cranberry Cider recipe from Betty Crocker.  Oh, yeah!

What's next, you ask?  I don't know, but if I can get past wasting these joyous little berries of joy for something other than eating, I might work them into a candle or body scrub.

So, there's my take on cranberries...quite possibly my favorite berry.  Yes.  My favorite.

Tuesday, December 6, 2011

Holiday Hooch

I remember when I was a kid, my parents would let us have a little taste of Bailey's Irish Cream during the holidays.  I was skeptical as a kid because, well, it's booze!!!  It had a bit of a weird flavor under all the chocolately-coffee flavored goodness.  Nevertheless, I liked it and when I finally reached the age of consent, I enjoyed a splash of it in my after-dinner coffee or by itself on the rocks.  Yum!

Well, with the advent of the internet, anything is possible!  The Diver learned to snow ski watching YouTube, Twin A learned how to hand knit from a website she found during a Google search.  There is no end to the wonderful things to be found on our beloved internet.  You see where I'm going, right?  So, you can imagine the sheer joy I felt when I discovered (via Pinterest, of course) that I don't need to spend $25 for a tiny bottle of Bailey's Irish Cream.  I could MAKE IT MYSELF!!!!

Now, you know I wouldn't be posting this unless I'd already done it, but I feel the need to qualify why I made it.  First, well...it's the holiday season and nothing says "let's celebrate the birth of Christ" like a good bottle of homemade hooch, no?  Second, I'm gearing up to add a few new cookies and candies to my Christmas repertoire.  One such candy is going to involve Bailey's.  I'm not sure how just yet, but keep your eyes peeled for more info later.

So, all that being said, here's the recipe I used (modified a bit for my needs) and a cute little picture I took to showcase it's loveliness.  Enjoy!

Ingredients:

2 cans sweetened condensed milk

1 cup heavy cream

1 cup milk (I used 2%)

2 2/3 cups Irish Whiskey (I would have used Jamesons, but well...I don't drink the good stuff...any will do, even if it's not Irish, but I'm sure if it's not, that would be disrupting the order of things somehow)

2 tbsp. chocolate syrup

2 tsp. instant coffee grounds

2 tsp. vanilla extract


Here are a few notes before you mix everything up.  Make sure you have a container that you can close tightly when storing this IN THE FRIDGE.  I washed out a plastic milk carton and it works fabulously, although I had to mark it clearly with a Sharpie so the twins didn't think it was chocolate milk.

I'm not an artist, so just to clarify
...that's supposed to be a skull & crossbones
The mix is fairly thick, and from what I can imagine, you can thicken it as much or as little as you like by shifting the amount of cream and milk.  I think my next batch might be all 2% milk.

I'd also advise on blending everything but the whiskey together first.  Don't overblend, but just enough to incorporate everything.  Lastly, add the whiskey and mix in, again, not too much.  If you blend too much, the cream will separate from the whiskey and it will be GROSS.  I used a blender on low for less than 20 seconds each time.

I had a taste test about 2 hours after making my premiere batch and the coffee taste was too strong.  After letting it sit in the fridge overnight, I tried it again.  It now tastes just like Bailey's!  SUCCESS!!!

Here's what a poured glass looks like, but I don't recommend serving it with this much chocolate syrup...it gives it too much chocolate flavor.  I just wanted to see what it would look like drizzled down the side of the glass.  Kinda fun, but not worth it.


Now, get to mixing and enjoy!


Look!  It even makes a great gift!  

Saturday, November 26, 2011

I Surprised Myself With Craftiness - The Christmas Post!

Normally, I'm the person who steals ideas from everyone else when it comes to being crafty.  Looking back now, I realize that I actually had one idea that I can honestly say I never swiped from someone else.  Of course, it had to revolve around my favorite holiday.  Here's how it went down...

It started with the single years:  The Christmas tree was small, but it was mine.  Every ornament was placed in the perfect spot.  It was cute, cozy and mine!

Then came the newlywed years:  The Christmas tree was twice the size...I had to share now, it was hard to get in the house and needed WAY more ornaments than we had.  Thus began the need to buy more ornaments to fill it up.  Ornament purchases became a habit, a very addictive habit, I might add.  I think someone in my family passed that addiction down to me, right mom?
The Two Thirds Tree...the bottom third has no ornaments!


And on to the new parent years:  In reality, this didn't start until the girls were about a year old.  The Christmas tree was still big, still had lots of ornaments on it, but they were getting broken at a very high frequency.  


Year Two, getting the hang of things
Finally came the "Mommy, can I help?" years.  That started when they were about 2.  They loved to hang ornaments on the tree.  They loved to hang every single ornament on the same branch.  They loved to relocate ornaments every ten minutes or so.  They broke so many ornaments.  So.  Many.  Ornaments.

This got me to thinking...what if I tried to distract them from screwing up MY tree and let them have a tree of their own?  Mind you, this revelation took two years to come to fruition and only fully formed after I read an article about how to make and paint dough ornaments.  Remember doing that when you were a kid?  So did I and as so many crafts in our house are born, after I shook off my memories of a simpler time, I was skidding around the kitchen, collecting the necessary items to bake up the cutest little ornaments ever!

I baked SO many ornaments!  I think there were probably five dozen when all was said and done.  I went shopping online and found 7 foot prelit artificial tree for a STEAL and figured that could be the tree the girls decorate.  It also doubles as added "Griswold" as it sits in the dining room window for the whole neighborhood to see.


Year one, we made popcorn and painted as many of the cookie ornaments as we could before we got tired of the craft.  Year two, we chose a new craft ornament (foam snowmen) and year three, we did bell snowmen and reindeer.  The girls get ornaments from my parents every year and they are added to the tree, too.  The tree is overloaded with ornaments, but its theirs to decorate and they love making new ornaments to add each year.

I have them mark their creations with their name and the date.  That way, when they're older, they'll have craft ornaments from each year to share with their kids.  It's a lot of fun and really, who thinks one tree is enough?  Not me!!!!


Of course, it's not always easy when there's candy involved

I still haven't figured out what their 2011 ornament will be, but I'm leaning toward something with lots of GLITTER!


Thursday, November 17, 2011

Oreo Cookie Pops Made Me Into Super Mom

Tomorrow is the twins birthday and I made the mistake let them choose what 'treat' they wanted to give their classmates.  They chose "those cookie pops that Auntie Tracy made on Halloween."  Okay, I can do that.  I was lucky enough to get a running start (that means trial and error) to get them just right.  I found the recipe, tweaked it a bit, researched melting chocolates (I now know the difference between tempering and melting.  Yes, there IS a difference!  Want to know more?  CLICK HERE.

I was so excited to get this project done a full day in advance that I forgot to take the step-by-step pictures, so you'll just have to trust me on the directions I give.  First, it is TOTALLY feasible to do this as a last minute dessert, if you just do step one first and freeze.  So, that being said...here is step one!

Ingredients:  32 Oreo cookies (that's one package), 1 brick of cream cheese (the 8 oz. size), 2 cups white chocolate chips, 2 tbsp. Crisco.

Mix the cookies and cream cheese together.  I used a Cuisinart but you can use anything that gets the cookies crushed finely and fully incorporates the cream cheese.  When it's all mixed, it will look like a very dark, rich ball of shiny dirt.  Stick it in the fridge for about 15 minutes.  Take it out, using your hand or a cookie scoop, shape into 1" balls and put them on parchment paper and into the freezer they shall go!

About 30 minutes later, take them out of the freezer and put them into the fridge.  Get your chocolate and Crisco into a microwave safe dish and melt for one minute at about 70% power.  Stir, stir, stir!  I also keep a pot of hot water on the stove to reheat the chocolate in case it starts getting too thick.

If you're making truffles (basically a stick-less pop), have a plate with parchment paper close by to place finished truffles onto.  If you're going to be using sticks and making pops, have a stand or some styrofoam handy to put the sticks into to dry.

Now, Bakerella has the best instructional video that helped me dip the perfect pop and I suggest you watch it because this gal is (1) a genius and (2) also gives some great ideas and tips for lots of pops.  It only takes 4 minutes to watch.  Go, do it now...I'll wait!

Now that you know the basics, get about 4 or 5 truffles out of the fridge at a time.  If you're using a stick, try the technique you saw in the video.  If you're making truffles, use two forks to dip and lift the truffle.  Don't forget to get your sprinkles out if you're decorating them.

Here's how mine turned out.  I'm off to try a 'pseudo-raw cookie dough' truffle recipe next.  I'll be sure to keep y'all posted on that craziness.  Seriously, pseudo-raw cookie dough.  I could make a meal out of that stuff!


Wednesday, November 9, 2011

Recipe Time! Chocolate Peanut Butter Squares

These little gems are so easy to make and since I'm craving them, I thought I'd share the recipe!  They also work well if you're looking to make some yummy goodness for your neighbors this holiday season.  Make sure you have some room in the freezer for the pan you're going to use.

Ingredients:

1 cup butter, divided in half (that's two cubes, FYI)
1 3/4 cup confectioners sugar
1 cup peanut butter
3/4 cup graham cracker crumbs
1 cup semi-sweet chocolate chips or whatever high quality chocolate you might like

Blend confectioners sugar and graham cracker crumbs until well incorporated.  Melt one cube (1/2 cup) of butter in the microwave and add to sugar/graham cracker mix.  Add peanut butter last make sure it's WELL blended.  Spread mixture into pan.  I like to make little finger pokes all over the top (see the picture?  See how the chocolate is uneven?  Yeah, that's the finger poking, neato, huh?).  Put the pan in the freezer for about 20-30 minutes.

Next, melt the second cube of butter (that's another 1/2 cup) and chocolate in the microwave.  However, I like doing this on the stove, very slowly, so I can add different chocolates to get just the right flavor.  Once it's melted, take the pan out of the freezer, add the chocolate on top and spread it evenly.  Put it in the fridge and score when chocolate hardens.  Keep stored in the fridge or freezer.  They make great last minute desserts or gifts for neighbors, teachers or coworkers.  YUM!